

INTEGRATING WITH COYOTE ENGINES
NVU TECH DEPT. on 12th Mar 2025
This is another one that has been full of myths about how to run aftermarket gauges on. It’s a great engine and deserves to be used in builds without the hassle of gauge problems.
THIS ARTICLE RFERS TO USING THE FORD PCM. If you are using an aftermarket PCM, please refer to that section on our TECH BLOG.
SPEEDOMETER
There are all sorts of ways to get the speed signal using interfaces, tapping wires and reprogramming voodoo; however, we have found the least frustrating solution is just to use our 99010-04 GPS SPEED SENDER. Save the headaches and hassle and just run the speedo that way.
TACHOMETER
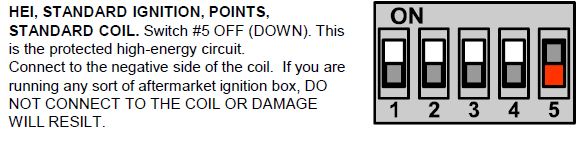
The tach has been a subject of much debate in the hot-rodding community. Using drivers, modules and boxes, tapping into the PCM, and all other "possible" ways to do this. Maybe it’s better just to go back to basics. Our customers have had great success just taking the signal off the trigger side of one coil, then setting the tach to 1 CYLINDER. (It thinks its 1 cylinder because its one coil on one plug).
The trigger wire is generally violet, it shouldn't matter which coil but many installers use the #4 coil for some reason, possibly for convenience. This would be considered a standard coil setup, leave the #5 DIP switch DOWN.
We also have a video covering setting up your tach signals and other settings:
WATER TEMP AND OIL PRESSURE
The factory PCM does not have a CANBUS provision for reading the actual pressure.
The factory head temp uses an algorithm to approximate the actual coolant temperature.
These two factors require senders be installed to actually know what the heck is going on in the engine. Its not a huge deal to overcome, here are the steps to installing senders:
There are a variety of manufacturers out there that make adapters for this, as a much better price point than we could hand machine them for so keep an eye out!
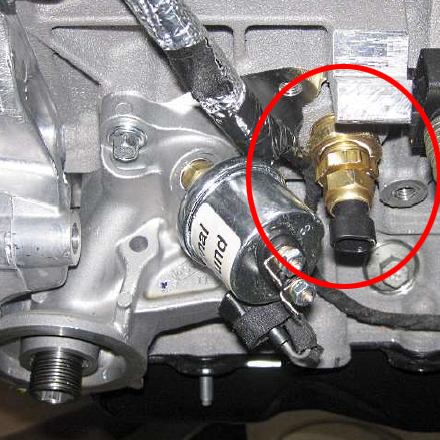
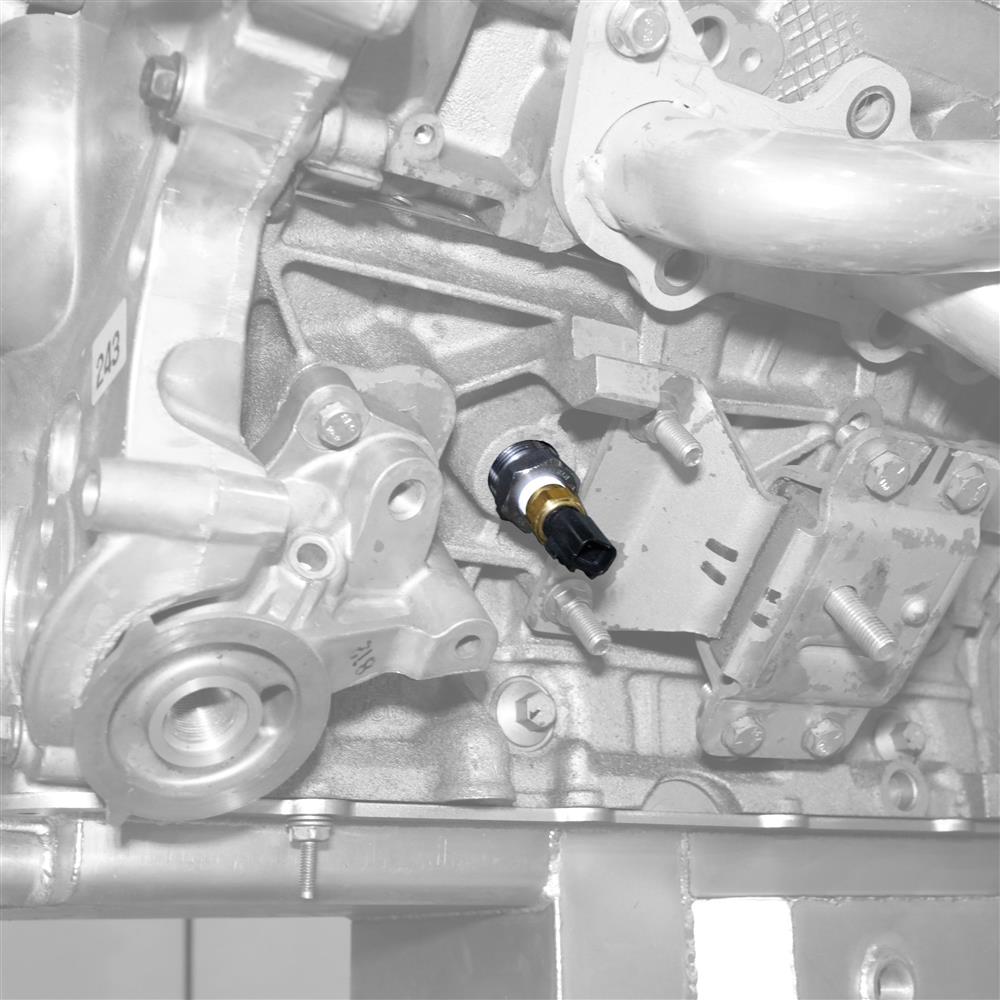
The block side is 1/4 NPTF and on the sender side 1/8" NPT. Depending on your PCM you may or may not need to use the stock pressure warning switch. Most of the adapter fittings have a provision for this BUT make sure you get the right one, Gen I and Ii use the same sender but some later 2016 used the Gen III 16mm sender.
The port used is on the driver side, near the oil filter next to the water temperature sender location. You may want to do the water temperature sender first to give yourself some room. You can see how they angle toward each other.
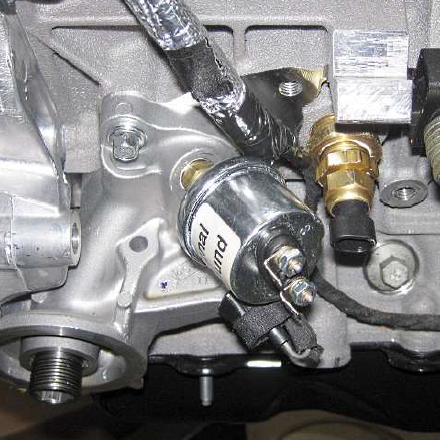
The temperature sender port is located just to the right (rear) of the oil pressure port. According to our research it is 3/4 NPT. Our temp sender is 1/8" NPT so you can use our standard bushing kit that was included in your gauge kit.
VOLTS AND FUEL
VOLTS is internally monitored, and no additional wiring is required.
FUEL LEVEL is read from your fuel sender in the fuel tank. Our Phoenix Platform gauges have fully programmable, dampened fuel gauges that can work on just about any tank/sender. We have a comprehensive article on how to use, set-up and test fuel senders and gauges RIGHT HERE>>>>