PRESSURE AND TEMPERATURE SENDERS
NVU TECH DEPT. on 11th Mar 2025
How do you install your oil pressure sender? Its not too difficult, you just need to know where the best place for your application is.
Most aftermarket senders come in 2 flavors, the most common is a resistance style. These have been around for a century and are proven to be extremely reliable. This is the type we use at NVU. They read from 0-100 PSI and have a 240-33Ω resistance range. We use these on just about everything except fuel pressure.
The second type of pressure sender is what is known as a transducer. This uses 5V power and a ground to generate a .5-4.5 voltage signal. This is not interchangeable to use with gauges that use a resistance style input. They are both similar in accuracy, the only advantage of this type is size.

Both types have a 1/8-NPT (pipe thread) and may require adapter bushings to properly screw into your engine. The adapters do not have any effect on the sender as pressure is constat throughout the fitting.
There are a variety of standard, metric and angled adapters available for your pressure sender, as long as it has a thread, the sender will be able to be used.

SEALANT: Use a liquid type of sealant, avoid using Teflon tape. Teflon will degrade the ground (and the readings) and will not hold up to heat very well.
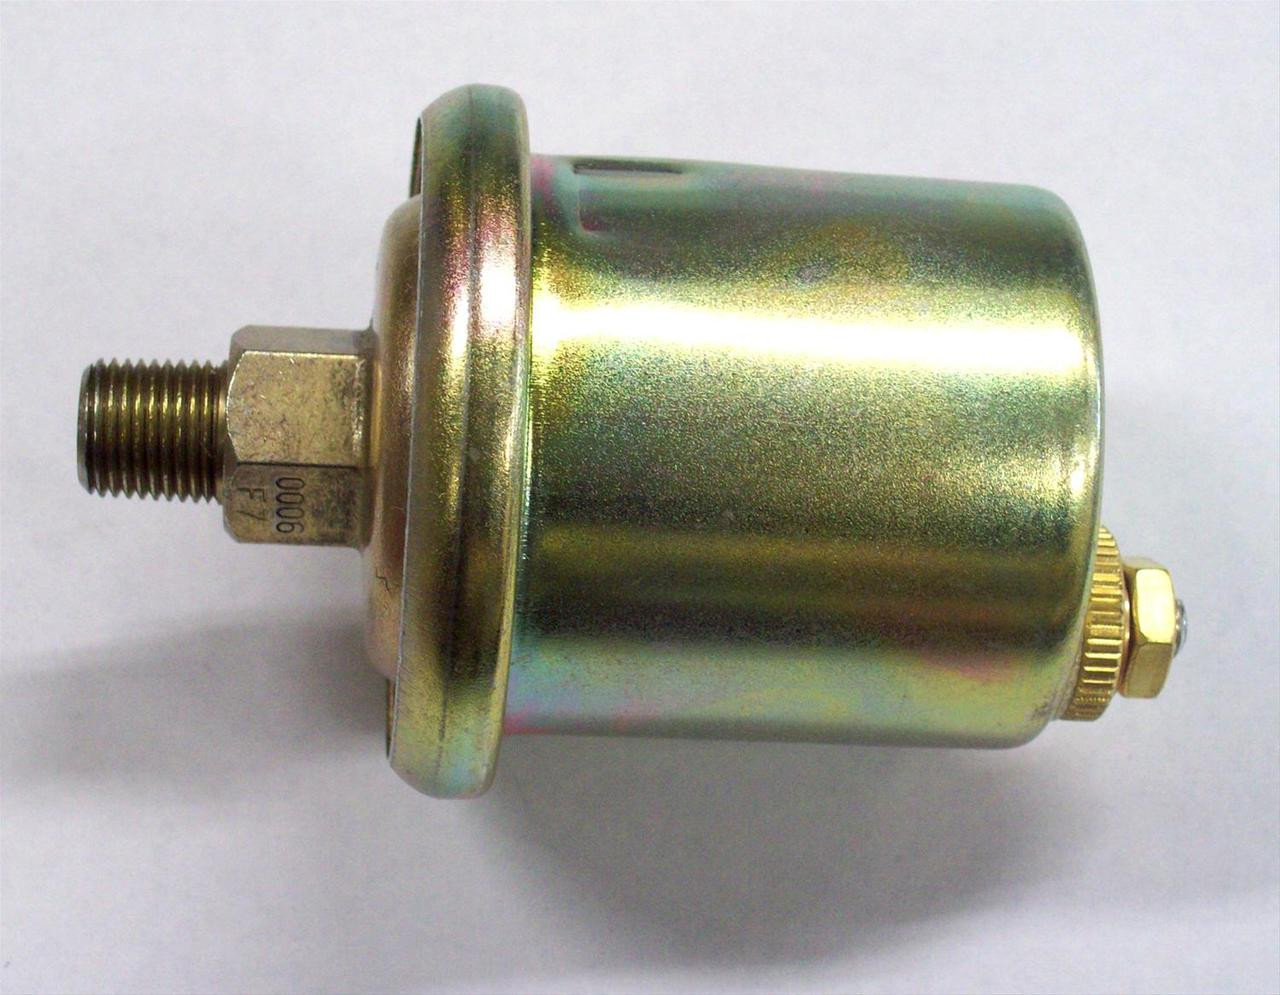
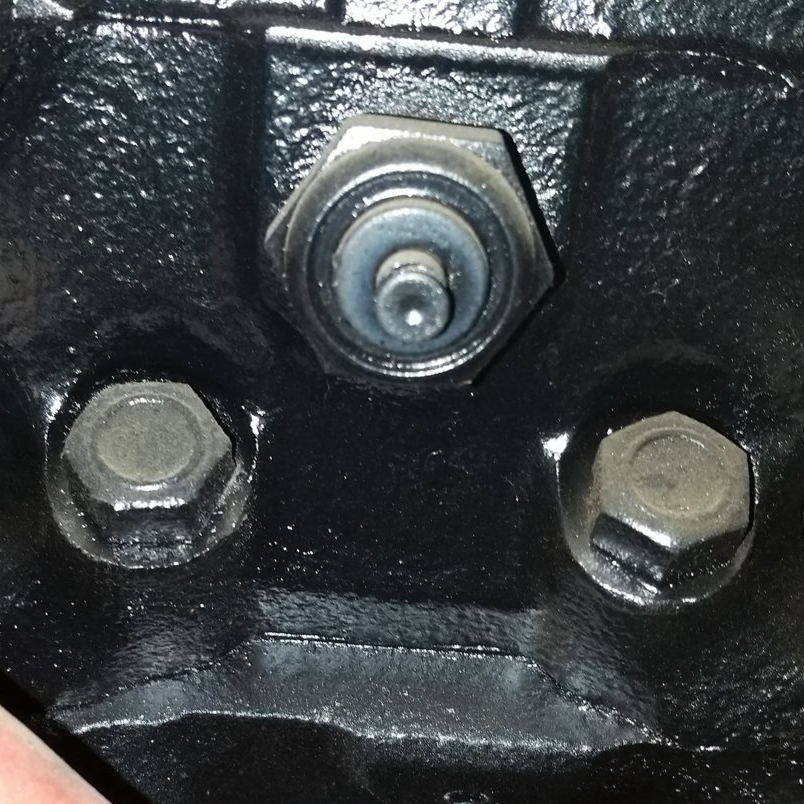
Below is an oil pressure switch. DO NOT USE THIS! It is smaller but it’s not a sender and will not operate a gauge, it is intended to trigger a warning lamp.

SMALL BLOCK CHEVY:
The oil pressure port is located on the driver side below the distributor. Many times, you may require a 45- or 90-degree elbow to get the proper clearance. We have used brass, galvanized and black pipe for decades without any issues. We just recommend not making the pipe too long as vibration may cause cracking of the pipe.
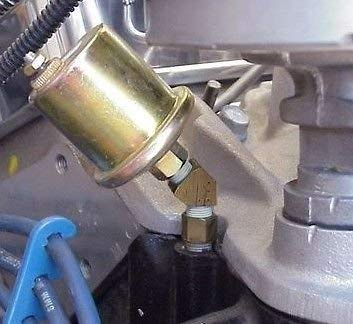
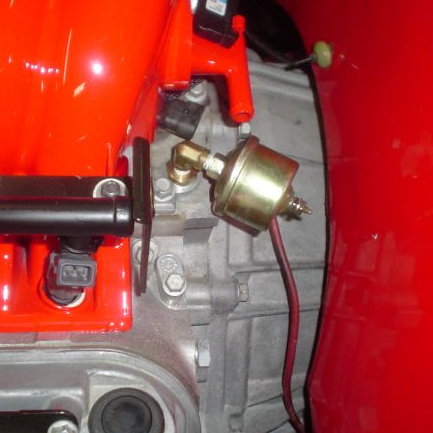
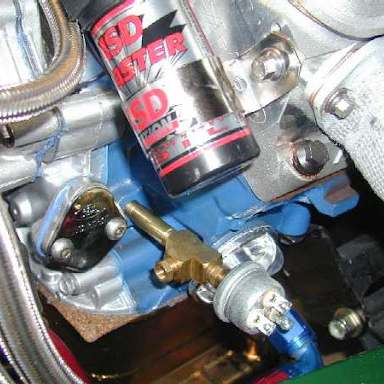
Below is a typical installation using a 45-degree elbow. Use liquid sealant and avoid Teflon tape.
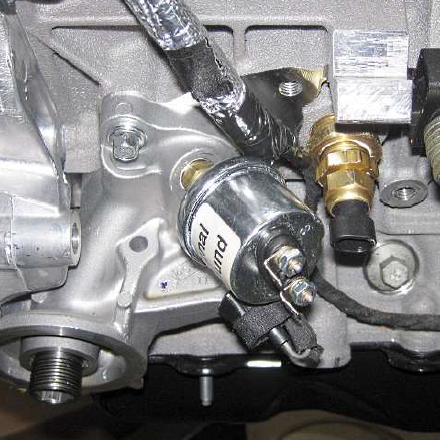
The next image shows splitting the pressure sender and adding a warning switch. this is about as "long" of an adaptation we would like to see.

There are several potential locations for your temperature sender. It’s up to you to decide what's best for your installation, it may come down to space or appearance on your build.
The first 2 are in the intake manifold. Depending on the manufacturer of your intake, there may be several locations to choose from. Thread size may differ from manufacturers, but they are generally NPT sizes and our standard bushing kit that came in your gauge kit can be used. Like small block fords, you can also use a thermostat housing/water neck with a temperature sender provision. again, thread size will vary based on the manufacturer.
The second is on one of the cylinder head ports. This is usually 1/2" but may vary by year and if its an aftermarket head. These are generally NPT size and our adapter kit that came with your gauge kit should work well for this.
GM LS ENGINE:
Our LS sender install video covers all of the odd-and ends of both the temp and pressure senders in-depth, check it out:
For the best results we recommend using liquid type sealant on the threads, avoiding Teflon that may cause grounding and longevity issues.
The LS has 2 possible locations for the pressure sender, both will require our LS kit part number 99009-04 or similar to adapt to the metric threads. This will not fit LT engines, for some reason GM changed the thread pitch.
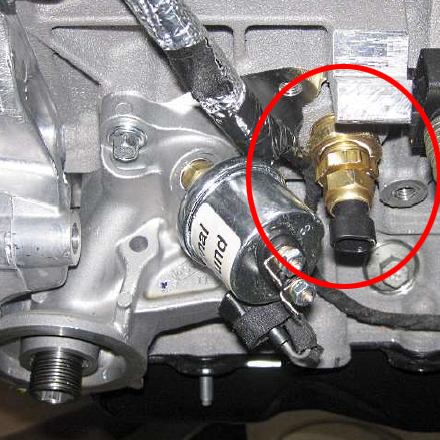
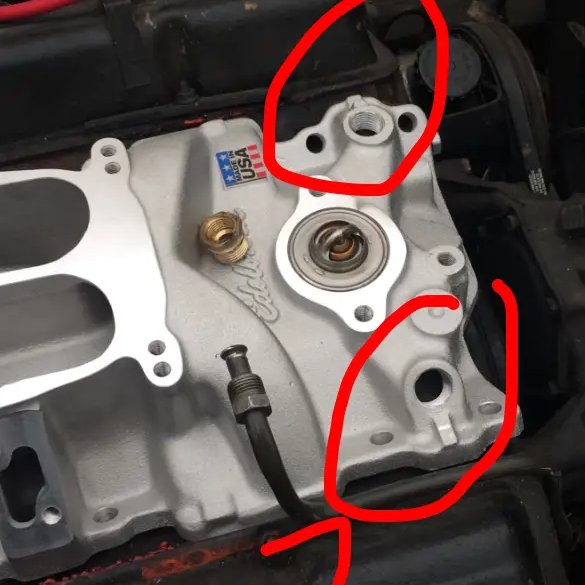
The first position is behind the intake manifold on the driver side. This is M16x1.5 and requires a gasket/seal (included in our LS kit). The image below shows an angle used, if possible, straight is easier and cleaner if you have clearance.
The second option is there is a port down by the oil filter. If this option works for you better and you have a truck block, you'll notice that the port may not be there. No problem, just remove the block-off plate and you can use an adapter that bolts on there. We have it shown both ways in our video above.
The temperature sender is also shown in the video above. It can be installed on the driver or passenger side of the head using our LS kit 99009-04. There may be slight variations from side to side/front to back on your temperature sender, this is common, and both sides may not read exactly the same. We have observed differences of up to 10 degrees, add that in with incorrectly matched EFI senders.... that's why we do standalone, you know exactly what the reading is.
SMALL BLOCK FORD
For the best results we recommend using liquid type sealant on the threads, avoid Teflon that may cause grounding and longevity issues.
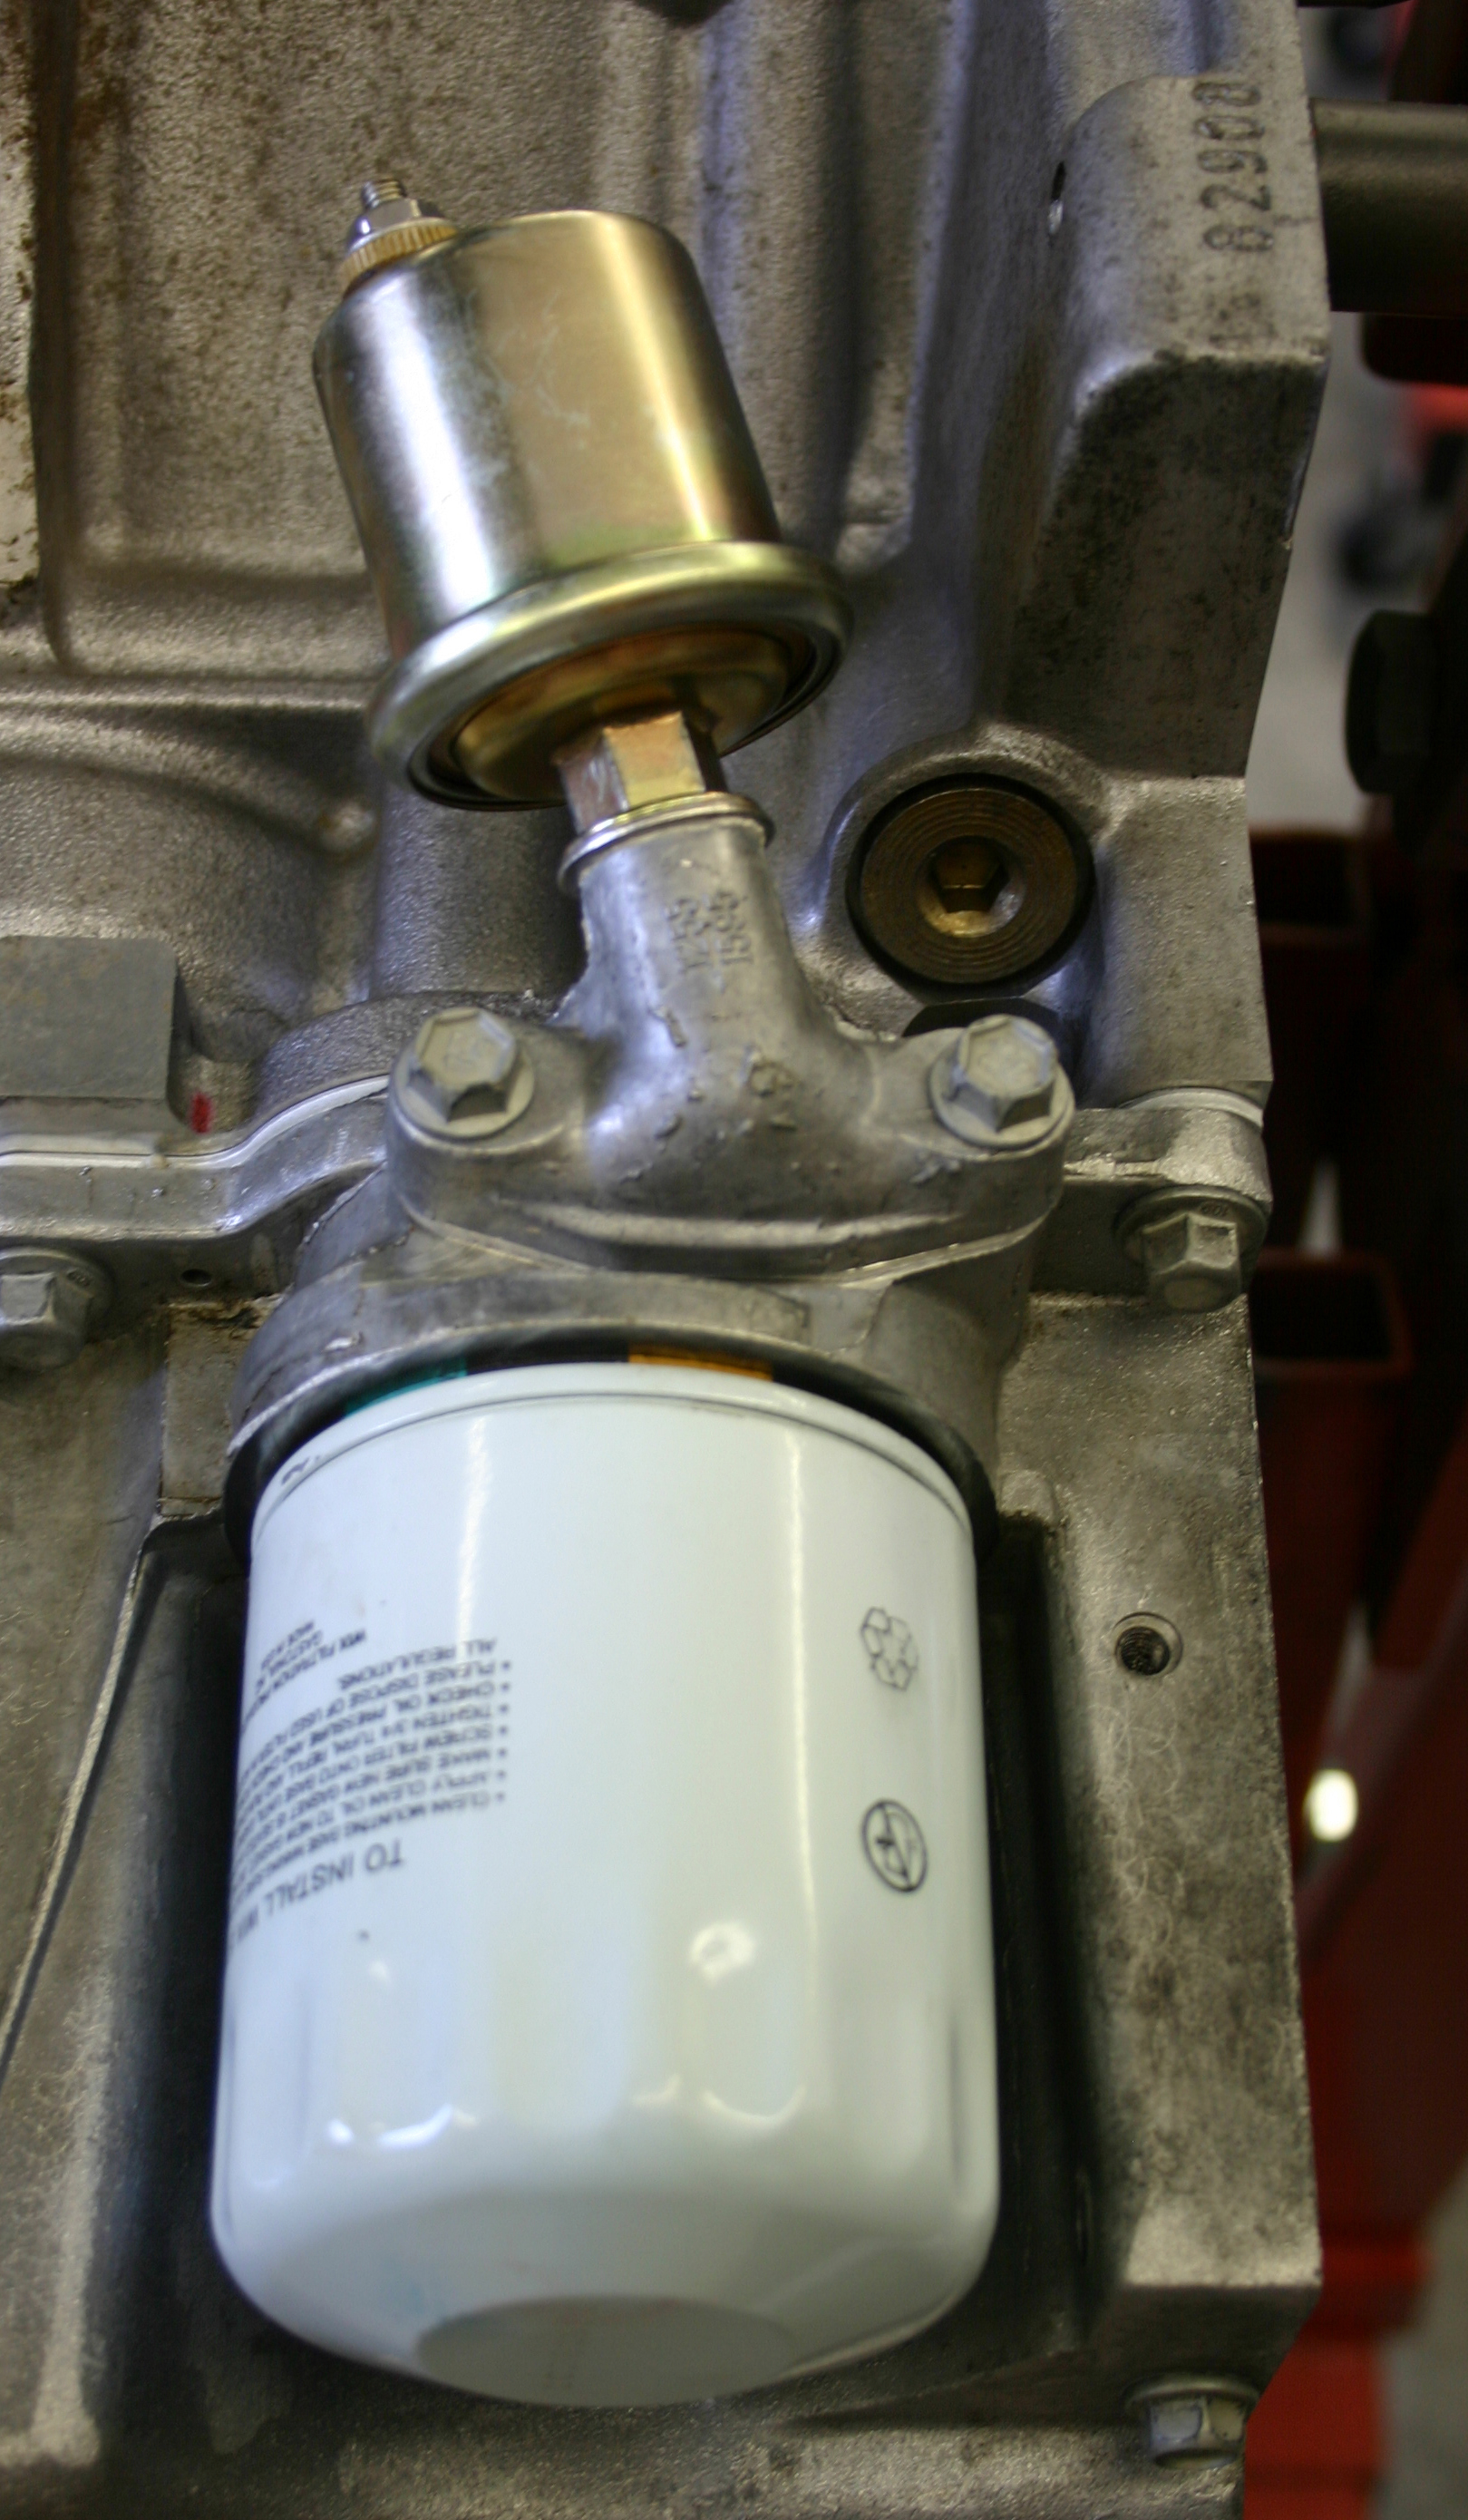
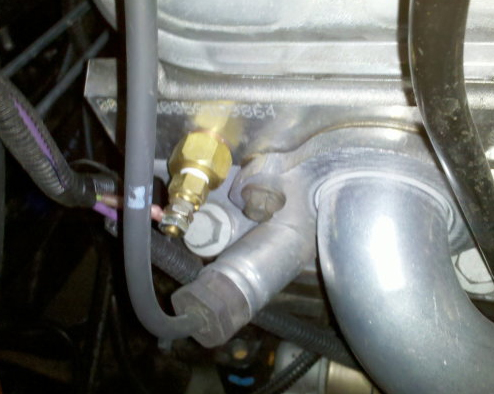
We get this call all the time and people just can't believe that Ford used a big, long extension for their oil pressure senders. Take a look at the driver side in front of the oil filter, that long extension is the pressure port, here is a stock setup:
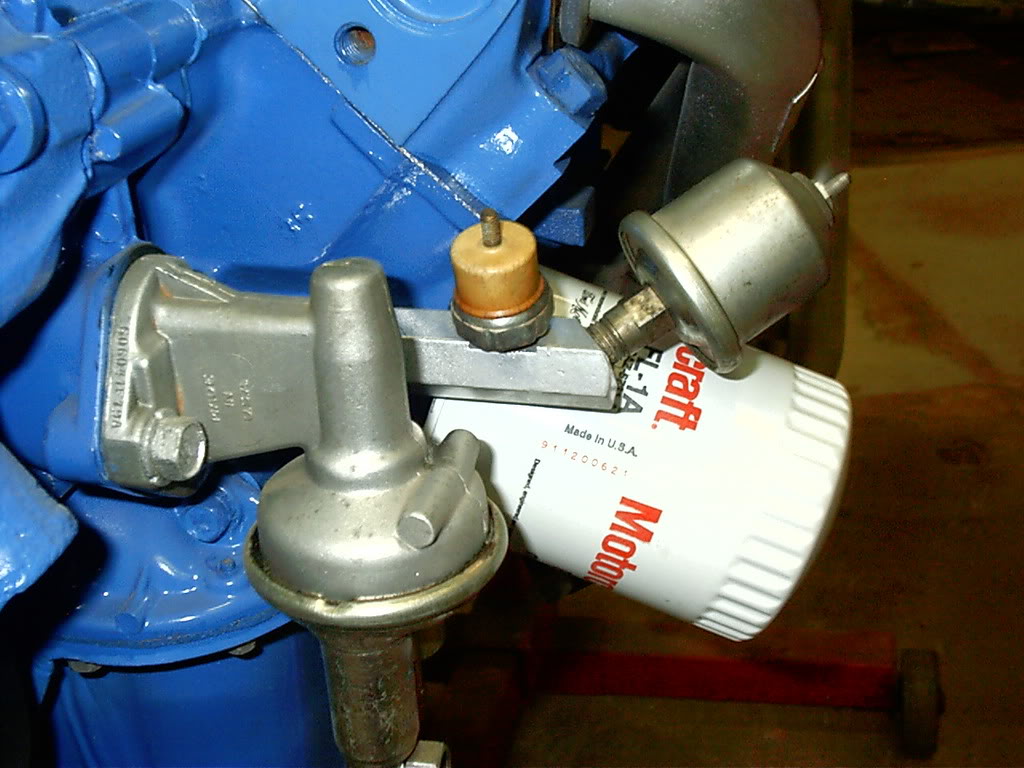
Here is a "homemade" setup, it is doing the same job. You can get away with a shorter version if you are not using a mechanical pump, not sure why this one is so long.
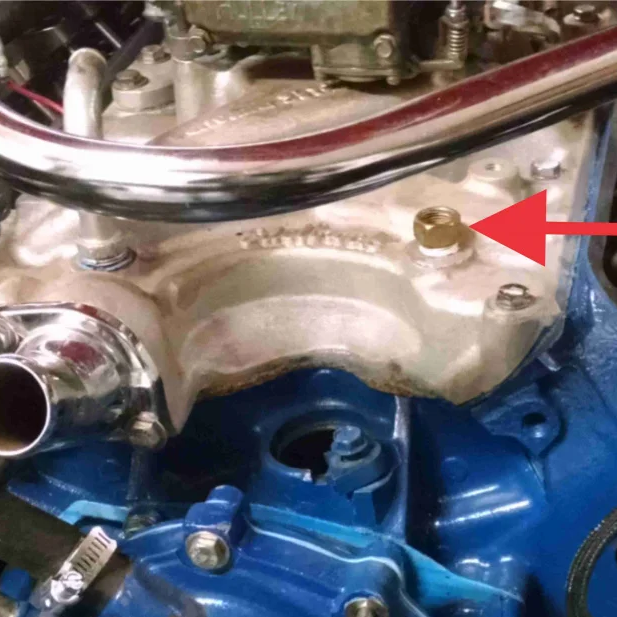
The temperature sender is generally located in the intake manifold just before the coolant exits via the thermostat and water neck. This can vary based on the manufacturer of the manifold. Make sure the distributor and manifold you use have proper clearance for your sender. Often you may need to use a thermostat /water neck housing with a sender provision. Generally, the thread size is 1/2" NPT but may differ by manifold manufacturer.
FORD COYOTE
The ONLY way to get oil pressure reading on a coyote is by using a gauge, its not available on the CAN so here we go....
There are a variety of manufacturers out there that make adapter for this, as a much better price point than we could hand machine them for so keep an eye out!
The ONLY way to get oil pressure reading on a coyote is by using a gauge, it’s not available on the CAN so here we go....
There are a variety of manufacturers out there that make adapters for this, as a much better price point than we could hand machine them for so keep an eye out!
The block side is 1/4 NPTF and on the sender side 1/8" NPT. Depending on your PCM you may or may not need to use the stock pressure warning switch. Most of the adapter fittings have a provision for this BUT make sure you get the right one, Gen I and II use the same sender but some later 2016 used the Gen III 16mm sender.
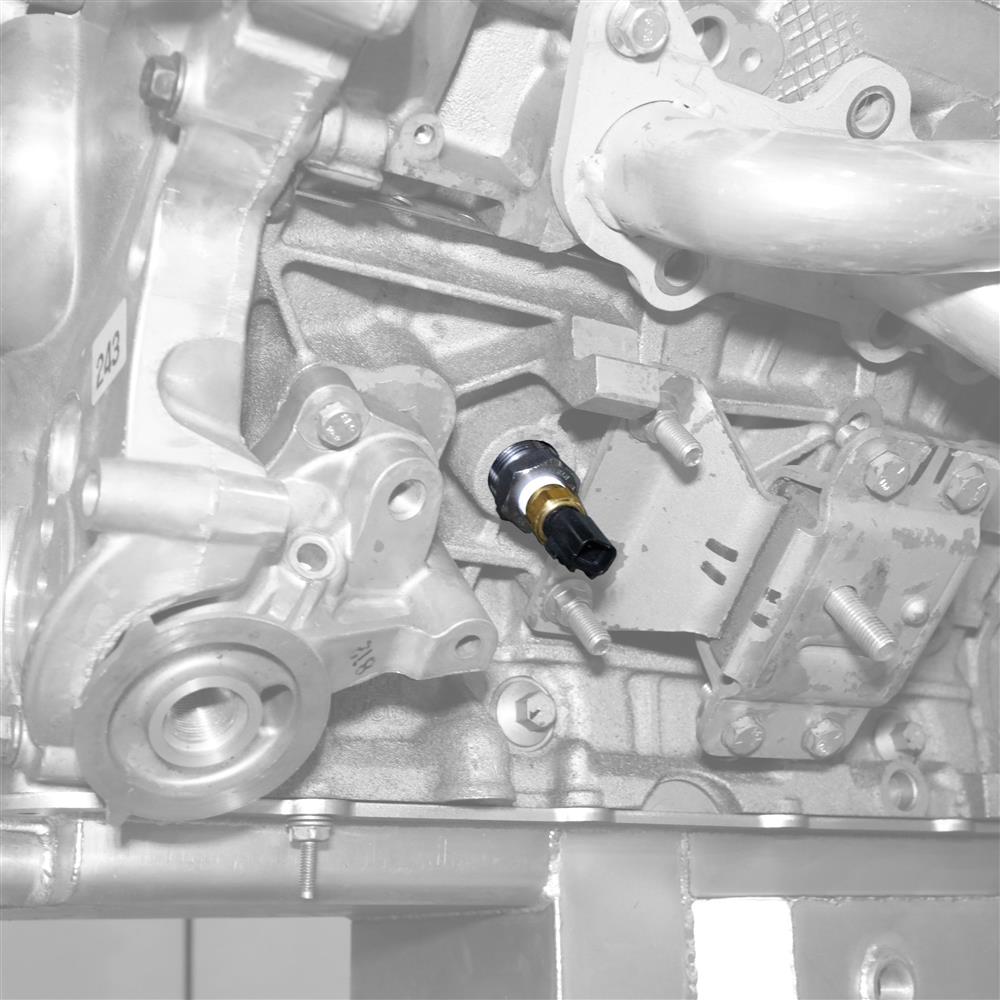
The port used is on the driver’s side, near the oil filter next to the water-temperature location. You may want to do the water temperature sender first to give yourself some room. You can see how they angle toward each other
The temperature sender port is located just to the right (rear) of the oil pressure port. According to our research it is 3/4 NPT. Our temp sender is 1/8" NPT so you can use our standard bushing kit that was included in your gauge kit.